Android Jetpack accompanies the Navigation design part, which improves the execution of routes in Android applications.
In this instructional exercise, you’ll add a route to a straightforward book-looking application and find out about:
Navigation graphs and nested graphs.
Actions and destinations.
How to pass data between destinations.
The NavHost interface.
Why Do You Need Yet Another Component?
Navigating between screens — passing data, handling the back stack, implementing deep links, etc. — can be complicated. It also comes with quite a bit of boilerplate. To top it off, you should adhere to the new principles of navigation:
The app should have a fixed start destination.
A stack is used to represent the navigation state of an app.
The Up button never exits your app.
Up and Back are equivalent within your app’s task.
By using the Navigation architecture component, you provide a consistent and predictable experience to users — hassle and boilerplate-free.
The Navigation part is accessible from Android Studio 3.3 and later. To utilize it you, add the following dependencies to
 // Navigation component
plugins {
    id 'com.android.application'
    id 'kotlin-android'
    // Ensure type-safety by using Safe Args
    id 'androidx.navigation.safeargs'
}

android {
    compileSdk 31

    defaultConfig {
        applicationId "com.materialuiux.navigation_components_example"
        minSdk 21
        targetSdk 31
        versionCode 1
        versionName "1.0"

        testInstrumentationRunner "androidx.test.runner.AndroidJUnitRunner"
    }

    buildTypes {
        release {
            minifyEnabled false
            proguardFiles getDefaultProguardFile('proguard-android-optimize.txt'), 'proguard-rules.pro'
        }
    }
    compileOptions {
        sourceCompatibility JavaVersion.VERSION_1_8
        targetCompatibility JavaVersion.VERSION_1_8
    }
    kotlinOptions {
        jvmTarget = '1.8'
    }
}

dependencies {

    implementation 'androidx.core:core-ktx:1.7.0'
    implementation 'androidx.appcompat:appcompat:1.4.0'
    implementation 'com.google.android.material:material:1.4.0'
    implementation 'androidx.constraintlayout:constraintlayout:2.1.2'

    // Navigation component
    implementation "androidx.navigation:navigation-ui-ktx:2.3.5"
    implementation "androidx.navigation:navigation-fragment-ktx:2.3.5"

}
also, you need to add type-safety by using Safe Args
To add Safe Args to your project, include the following classpath in your top-level build.Gradle file:
// Top-level build file where you can add configuration options common to all sub-projects/modules.
buildscript {
    repositories {
        google()
        mavenCentral()
    }
    dependencies {
        classpath "com.android.tools.build:gradle:7.0.3"
        classpath "org.jetbrains.kotlin:kotlin-gradle-plugin:1.6.0"
        // Ensure type-safety by using Safe Args
        classpath "androidx.navigation:navigation-safe-args-gradle-plugin:2.3.5"

        // NOTE: Do not place your application dependencies here; they belong
        // in the individual module build.gradle files
    }
}

task clean(type: Delete) {
    delete rootProject.buildDir
}
In order to have something to work with, let’s imagine we designed an application with the following structure:
First Fragment
Second Fragment
and we want to navigate from one fragment to another using the Android Navigation component and pass data to the second Fragment using Safe Args
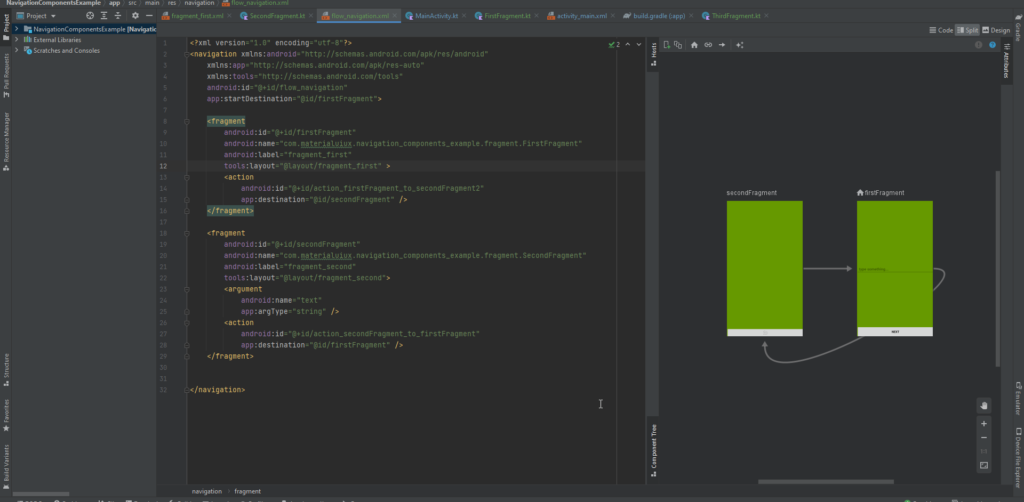
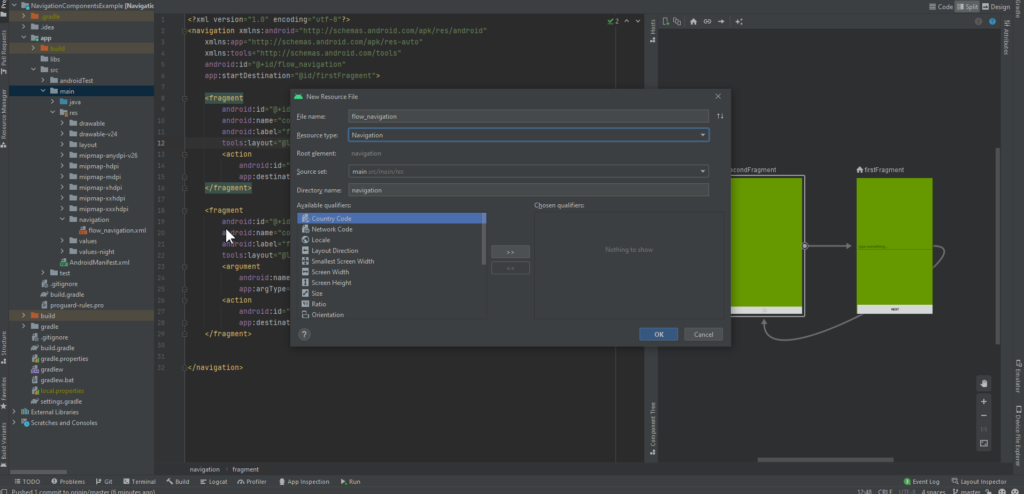
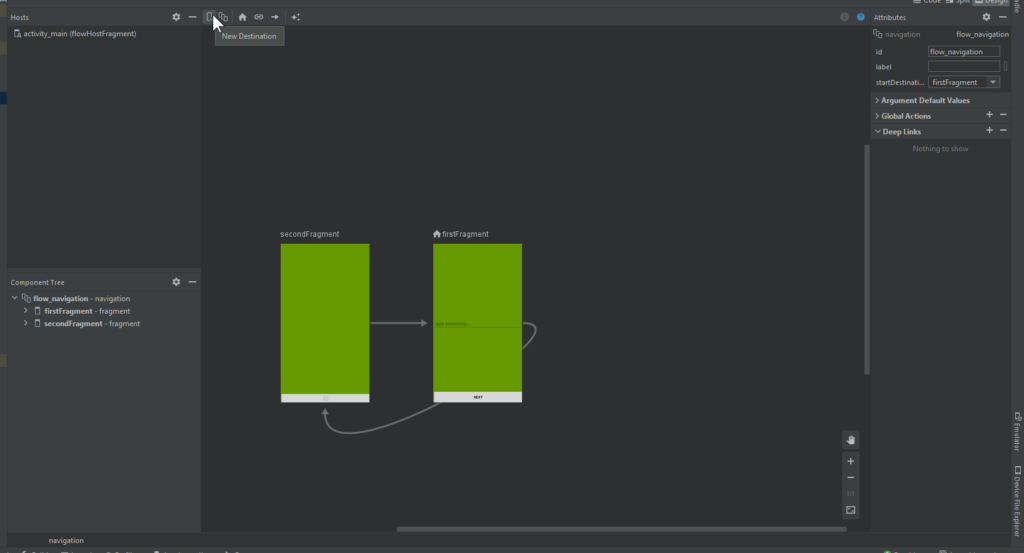
To begin using the Navigation Component, we need to create a navigation graph. This graph will act as our map, outlining the user flow in our application. To create one, right-click on the res folder and create a new resource file. We will name ours: flow_navigation.xml. Make sure to mark the type of the file as Navigation.
<?xml version="1.0" encoding="utf-8"?>
<navigation xmlns:android="http://schemas.android.com/apk/res/android"
    xmlns:app="http://schemas.android.com/apk/res-auto"
    xmlns:tools="http://schemas.android.com/tools"
    android:id="@+id/flow_navigation"
    app:startDestination="@id/firstFragment">

    <fragment
        android:id="@+id/firstFragment"
        android:name="com.materialuiux.navigation_components_example.fragment.FirstFragment"
        android:label="fragment_first"
        tools:layout="@layout/fragment_first" >
        <action
            android:id="@+id/action_firstFragment_to_secondFragment2"
            app:destination="@id/secondFragment" />
    </fragment>

    <fragment
        android:id="@+id/secondFragment"
        android:name="com.materialuiux.navigation_components_example.fragment.SecondFragment"
        android:label="fragment_second"
        tools:layout="@layout/fragment_second">
        <argument
            android:name="text"
            app:argType="string" />
        <action
            android:id="@+id/action_secondFragment_to_firstFragment"
            app:destination="@id/firstFragment" />
    </fragment>


</navigation>
now in the main activity add the main Fragment component to start initiating the fragments
<?xml version="1.0" encoding="utf-8"?>
<androidx.constraintlayout.widget.ConstraintLayout xmlns:android="http://schemas.android.com/apk/res/android"
    xmlns:app="http://schemas.android.com/apk/res-auto"
    xmlns:tools="http://schemas.android.com/tools"
    android:layout_width="match_parent"
    android:layout_height="match_parent"
    tools:context=".MainActivity">

    <FrameLayout
        android:id="@+id/main_activity_container"
        android:layout_width="0dp"
        android:layout_height="0dp"
        app:layout_constraintBottom_toBottomOf="parent"
        app:layout_constraintLeft_toLeftOf="parent"
        app:layout_constraintRight_toRightOf="parent"
        app:layout_constraintTop_toTopOf="parent">


        <fragment
            android:id="@+id/flowHostFragment"
            android:name="androidx.navigation.fragment.NavHostFragment"
            android:layout_width="match_parent"
            android:layout_height="match_parent"
            app:defaultNavHost="true"
            app:navGraph="@navigation/flow_navigation" />


    </FrameLayout>


</androidx.constraintlayout.widget.ConstraintLayout>
Now, in the First Fragment, do the following code to your corresponding view’s on click event to navigate to the next fragment and also add edit text view to pass the data by safe Args.
class FirstFragment : Fragment() {

    lateinit var navController: NavController

    override fun onCreateView(
        inflater: LayoutInflater, container: ViewGroup?,
        savedInstanceState: Bundle?
    ): View? {
        // Inflate the layout for this fragment
        return inflater.inflate(R.layout.fragment_first, container, false)
    }

    override fun onViewCreated(view: View, savedInstanceState: Bundle?) {
        super.onViewCreated(view, savedInstanceState)
        navController = Navigation.findNavController(view)

        view.findViewById<AppCompatButton>(R.id.btn_next).setOnClickListener {
            // start navigation to the second fragment and pass the text that was typed by Safe Args
            val action: NavDirections = FirstFragmentDirections.actionFirstFragmentToSecondFragment2(view.findViewById<EditText>(R.id.edit_text).text.toString())
            navController.navigate(action)
        }
    }
}
Now, in the Second Fragment, do the following code to your corresponding view’s on click event to navigate to the back to the First fragment and display the data that was passed from First Fragments by safe Args.
class SecondFragment : Fragment() {

    lateinit var navController: NavController

    // Safe Args
    val args: SecondFragmentArgs by navArgs()


    override fun onCreateView(
        inflater: LayoutInflater, container: ViewGroup?,
        savedInstanceState: Bundle?
    ): View? {
        // Inflate the layout for this fragment
        return inflater.inflate(R.layout.fragment_second, container, false)
    }

    override fun onViewCreated(view: View, savedInstanceState: Bundle?) {
        super.onViewCreated(view, savedInstanceState)

        navController = Navigation.findNavController(view)

        val tv: TextView = view.findViewById(R.id.textView)
        // show the passed text throw Safe Args
        tv.text = args.text

        view.findViewById<ImageButton>(R.id.btn_retry).setOnClickListener {
            // another way to handle back pressed
            navController.popBackStack()
        }
    }
}
Get the full source code Github